Deployment Settings
The Deployment Settings panel lets you configure your AI voice assistant for production use. It is divided into two main sections: Phone and Integrations & Automation.
Phone
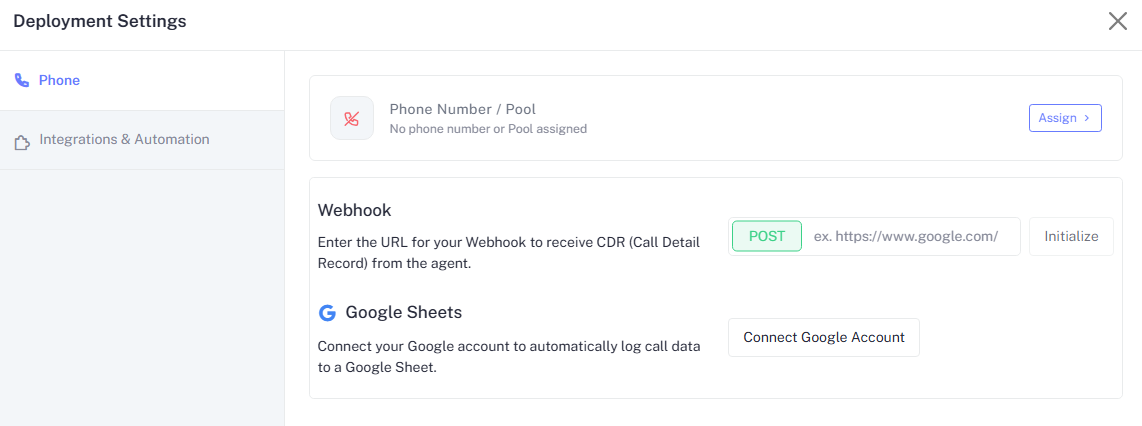
The Phone section lets you assign a phone number or pool to your assistant, configure a CDR webhook, and connect Google Sheets for automatic call logging.
Phone Number / Pool
Assign a phone number or a pool of numbers to your assistant so it can make and receive calls.
- Open Deployment Settings and select Phone from the left sidebar.
- Under Phone Number / Pool, click Assign.
- Select an existing number or pool from the list.
If no phone number or pool is assigned, your assistant cannot place or receive calls.
Webhook (CDR)
Send Call Detail Records (CDRs) to an external endpoint after each call.
| Field | Description |
|---|---|
| Method | POST fixed |
| URL | Your endpoint URL (e.g., https://www.example.com/cdr) |
Click Initialize after entering your URL to save it.
Google Sheets Integration
Automatically log call data to a Google Sheet.
- Click Connect Google Account.
- Sign in and grant the requested permissions.
- Call data will be appended to your selected sheet after each call.
Integrations & Automation
Navigate to Integrations & Automation in the left sidebar to access three tabs: Webhook, Schedule Call, and Voice Chat.
Webhook
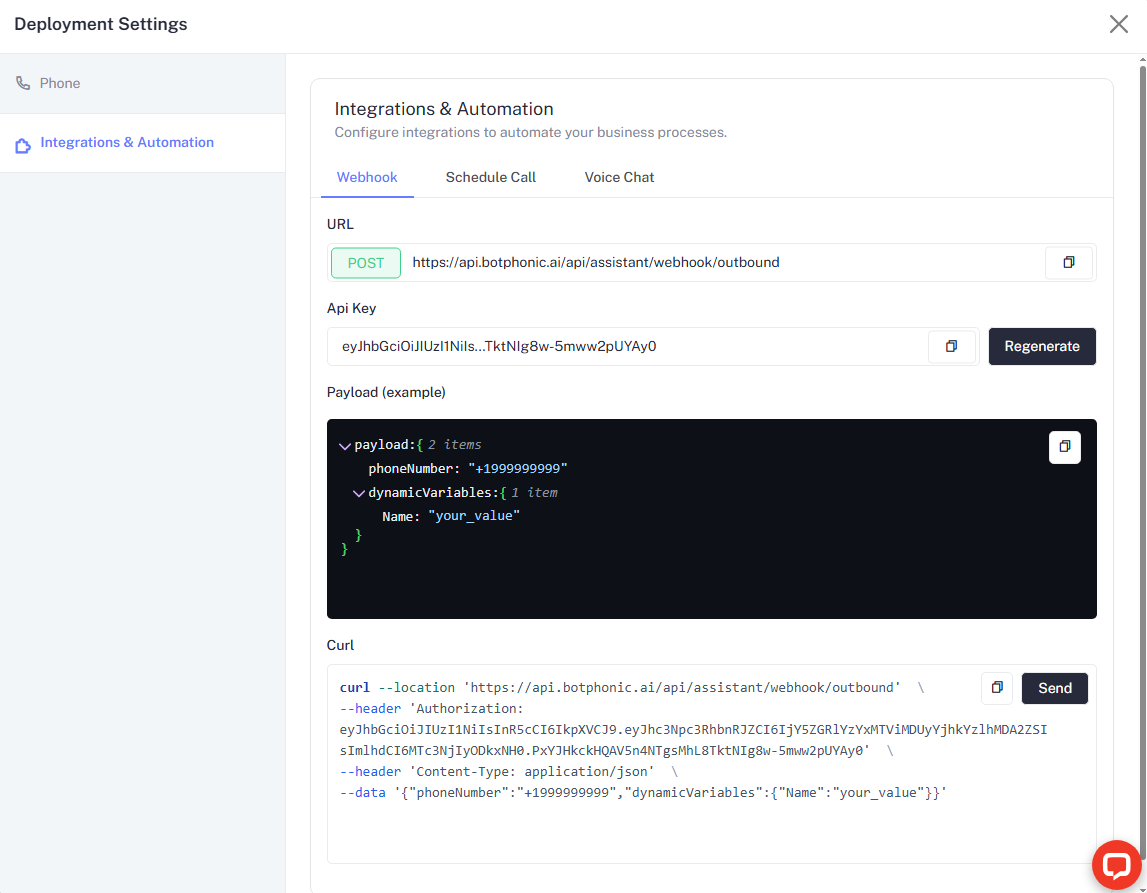
Use the outbound webhook to trigger your assistant programmatically via a POST request.
Endpoint
POST https://api.botphonic.ai/api/assistant/webhook/outboundAuthentication
Pass your API key in the Authorization header. You can copy or regenerate it from the API Key field.
Click Regenerate to issue a new API key. This immediately invalidates the previous key.
Payload
{
  "phoneNumber": "+1999999999",
  "dynamicVariables": {}
}| Field | Type | Required | Description |
|---|---|---|---|
phoneNumber | string | The E.164 formatted number to call | |
dynamicVariables | object | Key-value pairs injected into the assistant at runtime |
Example URL
curl --location 'https://api.botphonic.ai/api/assistant/webhook/outbound' \
  --header 'Authorization: <YOUR_API_KEY>' \
  --header 'Content-Type: application/json' \
  --data '{"phoneNumber":"+1999999999","dynamicVariables":{}}'
Click the Send button in the UI to fire a test request directly from the dashboard.
Schedule Call
Schedule one-off or recurring calls, either to an individual contact or to an entire campaign.
Viewing Scheduled Calls
The Schedule Call tab shows a table with all calls and the following status filters:
| Status | Description |
|---|---|
| Scheduled | Queued and waiting to run |
| In Progress | Currently executing |
| Completed | Finished successfully |
| Cancelled | Manually stopped or expired |
Each row shows Name, Start Date, Call Type, Schedule Type, Status, and an Action menu.
Click + Schedule Call (top-right) to create a new scheduled call.
Campaign Call
Use this mode to call a group of contacts at once.
| Field | Description |
|---|---|
| Campaign name | A display label for this scheduled run |
| Contact Groups | One or more groups to call |
| Start Date | Date and time to begin the campaign (format: DD-MM-YYYY HH:mm) |
| Repeat Schedule | How often to repeat defaults to Does not repeat |
Individual Call
Use this mode to call a single contact.
| Field | Description |
|---|---|
| Use Existing Contact | Toggle on to pick from saved contacts; toggle off to enter a new number |
| Select Contact | Choose a contact from the dropdown |
| Start Date | Date and time for the call (format: DD-MM-YYYY HH:mm) |
| Repeat Schedule | How often to repeat defaults to Does not repeat |
To call a contact not yet in your system, uncheck Use Existing Contact and enter the phone number manually.
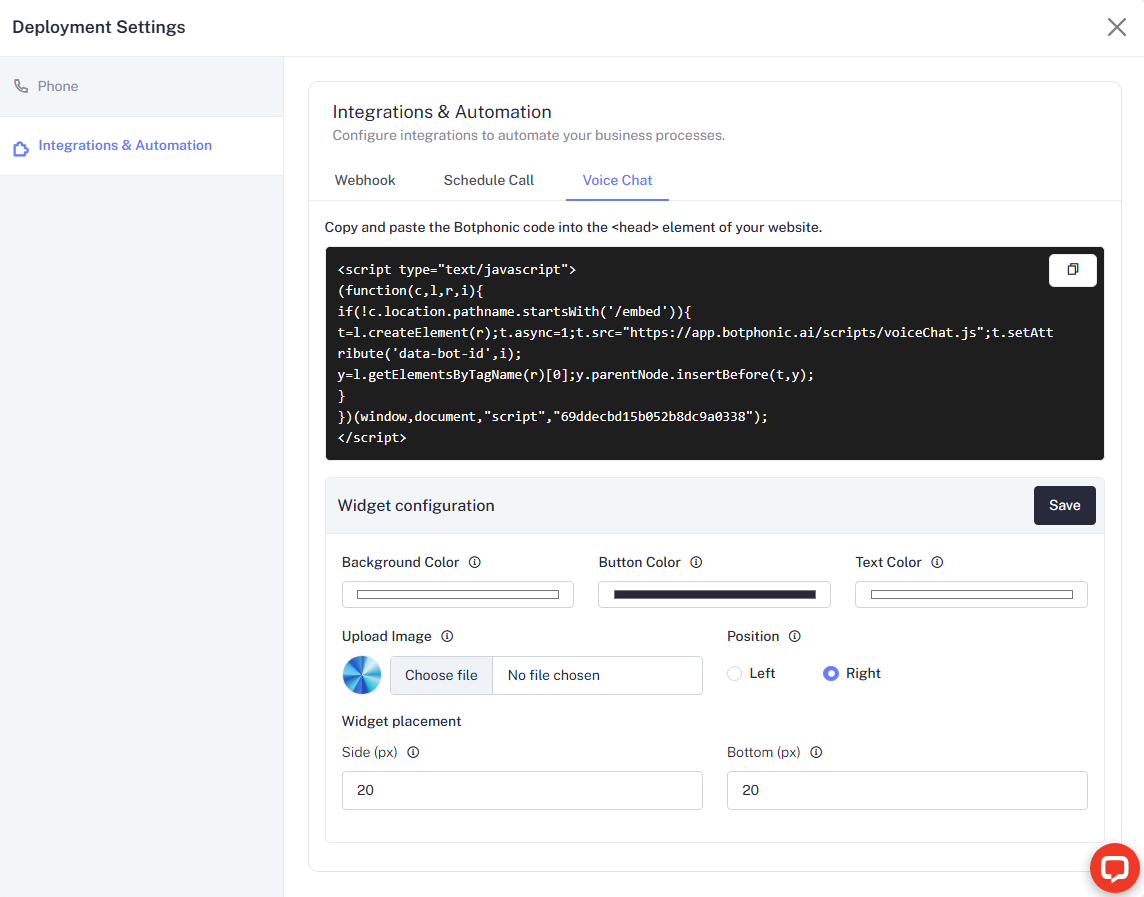
Voice Chat
Configure the embedded voice chat widget for your website or app. See the Voice Chat tab in the Integrations & Automation section for embed code and customization options.