Workflows
Workflows move beyond basic interactions by allowing you to build structured, multi-step automation paths. Using the visual canvas, you can manage the entire lifecycle of a lead from the first email sent to AI-driven follow-up calls and CRM synchronization via APIs.
Getting Started
When you create a new workflow, you have the flexibility to define the starting point based on your needs:
- Start from Scratch: Begin with a blank canvas for complete control over custom logic.
- Use Templates: Jumpstart your automation using pre-configured industry-standard templates.
Workflow General Settings
The General Settings panel is the foundation of your workflow. It defines the global identity and default behaviors for all actions within the flow.
- Workflow Name: A unique, descriptive title to identify the automation in your dashboard (e.g., "Real Estate Lead Nurturing").
- Workflow Description: A detailed explanation of the purpose, behavior, and expected outcome. This helps your team understand the logic behind the workflow at a glance.
- Email Pool: Assign a default email pool for round-robin distribution across contacts. This ensures your outbound volume is balanced across multiple sending identities.
- Note: Individual Email Nodes will use this pool automatically unless you override them with a specific email configuration.
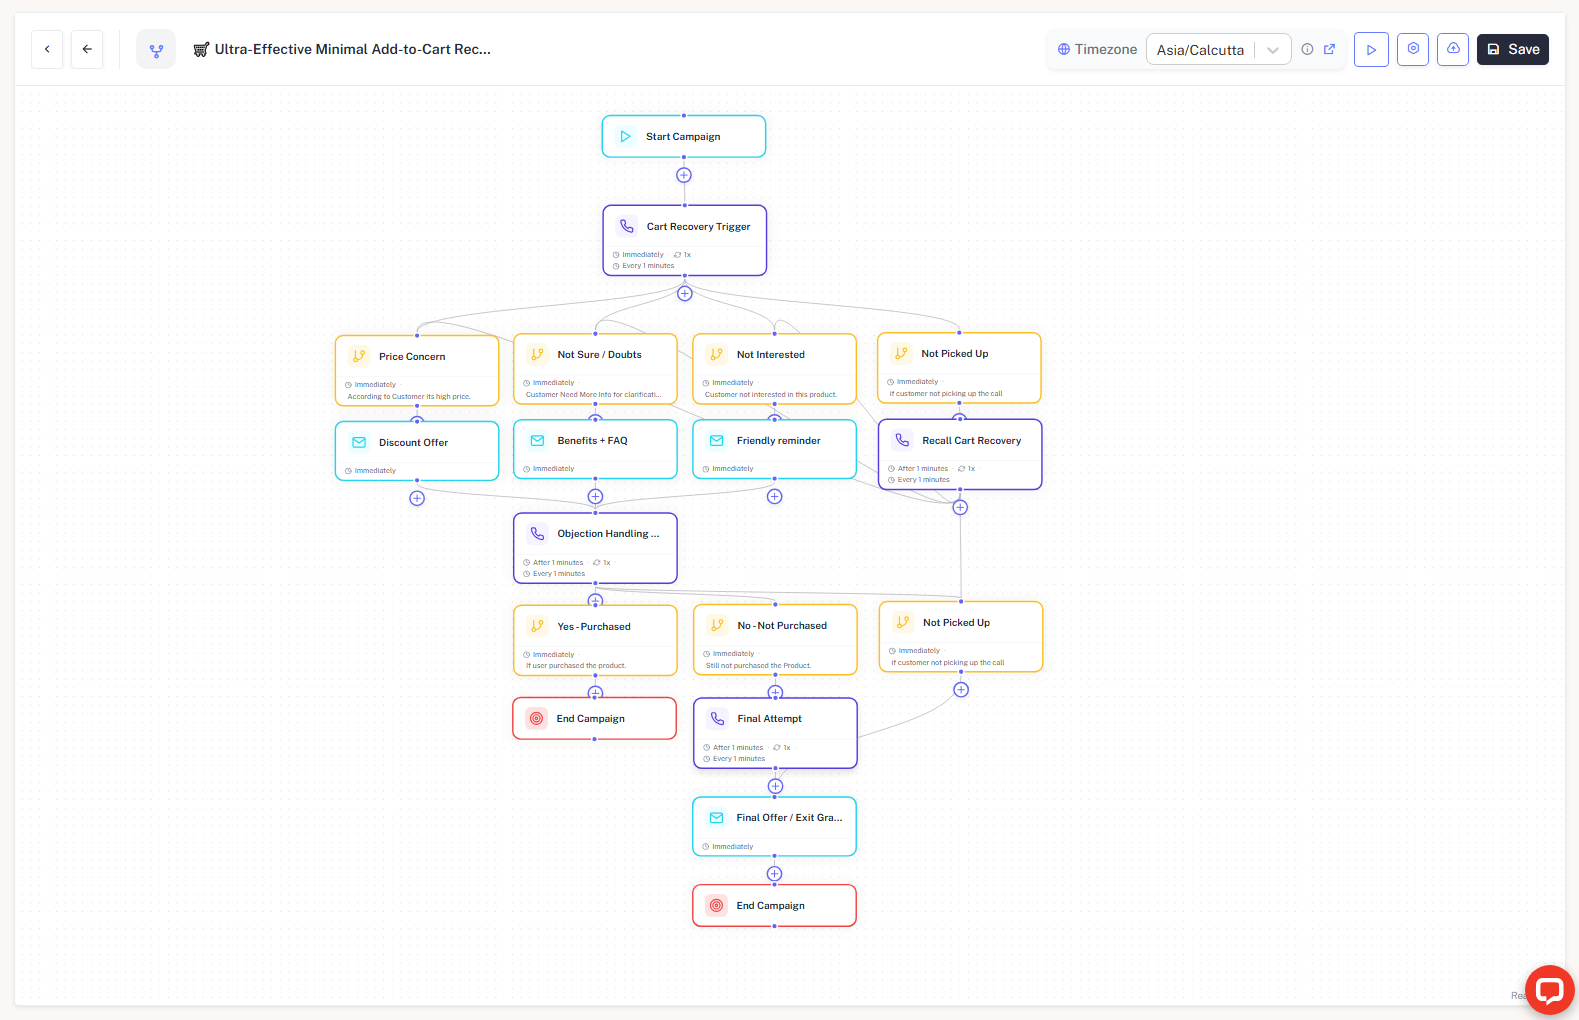
- Global Timezone: Managed in the top navigation bar (e.g.,
Asia/Calcutta). This is critical as it dictates when "Scheduled Executions" and "Specific Time" wait periods trigger.
Core Components
A workflow is built by connecting Nodes. Each node represents a specific action, decision, or integration point.
1. Start Node
The entry point of your automation. It triggers the execution flow for a specific contact or event.
2. Email Node
Automate and track email outreach within your workflow. This node handles content delivery and response monitoring.
Configuration Details:
- Node Label: A custom name for the node to keep your canvas organized (e.g., "Initial Outreach").
- Select Email Template: Choose a pre-made template from your library. Use the + icon to create a new one or the Refresh icon to sync changes.
- Select Email: Choose the sending identity. Using "As per workflow email pool" allows the system to rotate senders to optimize deliverability.
- Schedule Execution: Delay the sending of the email to a specific time window instead of sending immediately.
- Wait for Reply: Pauses the workflow until a response is detected or a timeout occurs.
- Delay Tab: Set a duration (e.g., 2 Days, Hours, or Minutes).
- Specific Time Tab: Set an exact calendar date and time for the timeout.
- No Response Handling: Define fallback behavior if the "Wait time for reply" expires. Options include Do Nothing, Retry, or moving to a specific branch.
3. Condition Node
Condition nodes act as the logic gates of your workflow, allowing you to create personalized customer journeys by routing users down different paths based on specific data or behaviors.
Configuration Details:
- Node Label: Give the node a descriptive name (e.g., "Check Engagement" or "High Budget Filter") to easily identify branching points on the canvas.
- Condition Logic: A powerful text-based rules engine where you can define the criteria for the "True" path.
- Logic-Based: Route leads using extracted variables or custom data points (e.g.,
if interest == "high"orif source == "referral"). - Engagement-Based: Branch the flow based on interaction history, such as whether a previous email was Delivered, Opened, or Replied to.
- Logic-Based: Route leads using extracted variables or custom data points (e.g.,
- Transition Mapping: Once logic is defined, the node provides multiple output ports. You can connect each port to a different subsequent node, ensuring that engaged leads and non-responsive leads follow separate, optimized paths.
4. AI Call Node
Triggers an automated, conversational AI voice assistant to perform a personalized outbound call.
Configuration Details:
- Node Label: Assign a unique name to this step for tracking in the execution flow.
- Select Assistant: Choose from your library of pre-configured AI voice assistants. Each assistant can have its own unique voice, personality, and knowledge base.
- Schedule Execution: Toggle this to manage when the call is placed.
- Add Delay: Set a specific duration (e.g., 30 minutes) to wait after the previous node is completed before placing the call.
- Schedule Specific Time: Select a precise date and time for the call to trigger, ensuring it aligns with your lead's local business hours.
- No Response Handling:
- If call not received/answered: Define the automated fallback logic if the call goes to voicemail or is not picked up. Options include Do Nothing or Routing the user to a retry branch or a follow-up email node.
5. API Node
Integrate your workflow with your external tech stack, such as a CRM, database, or internal messaging tools, to ensure data remains synchronized across your entire platform.
Configuration Details:
- Node Label: Name the integration point (e.g., "Sync to Salesforce" or "Slack Notification") for clear tracking in your execution logs.
- Select HTTP Action: Choose from your library of pre-configured API requests. This allows you to send data (POST/PUT) or retrieve data (GET) in real-time. Use the + icon to define new API endpoints or the Refresh icon to sync recent updates to your action list.
- Schedule Execution: Toggle this to manage when the API call is triggered.
- Add Delay: Set a specific duration to wait before the data is sent to your external system.
- Schedule Specific Time: Align the data sync with specific business hours or batch processing times.
- No Response Handling:
- If no response received: Define fallback logic in case the external server returns an error code or fails to respond. You can choose to Do Nothing, attempt a Retry, or redirect the user to a manual review branch.
Creating a Workflow
Initialize
Navigate to the Workflows tab and click + Create. Choose to start from a template or a blank canvas.
Build the Flow
Click the + icon below any node to add the next step. Drag and drop nodes to create the desired sequence.
Configure Node Details
Click on a node to open the Configure Node sidebar.
- Define the Node Label.
- Select your Email Template or AI Assistant.
- Set the Timezone (e.g.,
Asia/Calcutta) to ensure actions trigger at the right time.
Set Logic & Timings
Toggle Schedule Execution for specific timing or Wait for Reply to add pauses in the flow.
Save and Deploy
Once your logic is mapped, click Save Configuration followed by the global Save button in the top right to activate the workflow.