Deployment & Settings
Once your workflow logic is finalized on the canvas, the Deployment Settings allow you to connect your workflow to external systems and manage how executions are triggered.
Webhook Integration
Webhooks allow you to bridge the gap between your workflow and other third-party applications. You can both send data out and trigger workflows from external events.
1. Event Delivery Webhook (Outgoing)
This webhook delivers real-time execution data to your configured endpoint whenever an event occurs within the workflow.
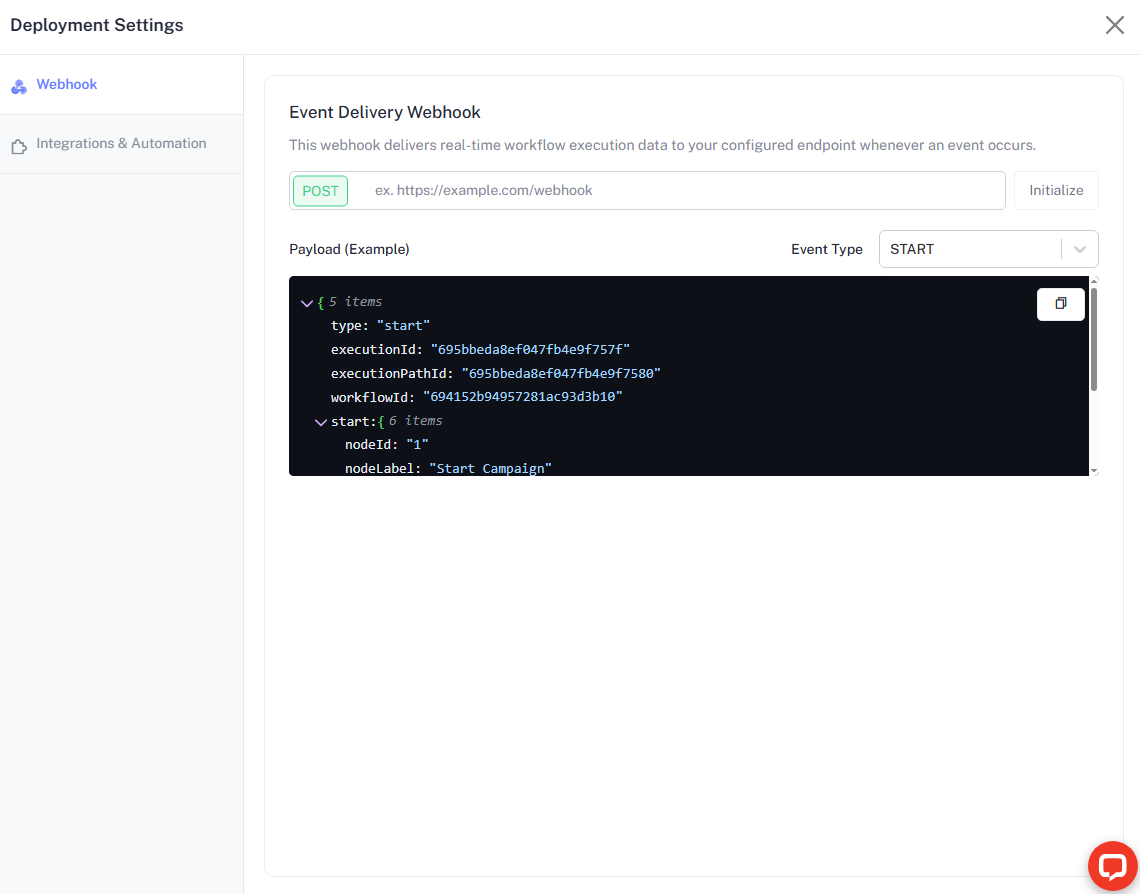
- Target URL: Enter your endpoint URL (e.g.,
https://your-crm.com/webhook) and click Initialize. - Payload Structure: The system sends a JSON payload including variables like
executionId,workflowId, andnodeLabel. - Event Types: Filter which events trigger the webhook, such as START,EMAIL, AI_CALL, API or EXECUTION FINAL STATE .
2. Trigger Workflow Webhook (Incoming)
Use this setting to start or stop workflow executions automatically from external sources, such as a lead form, CRM event, or billing system.
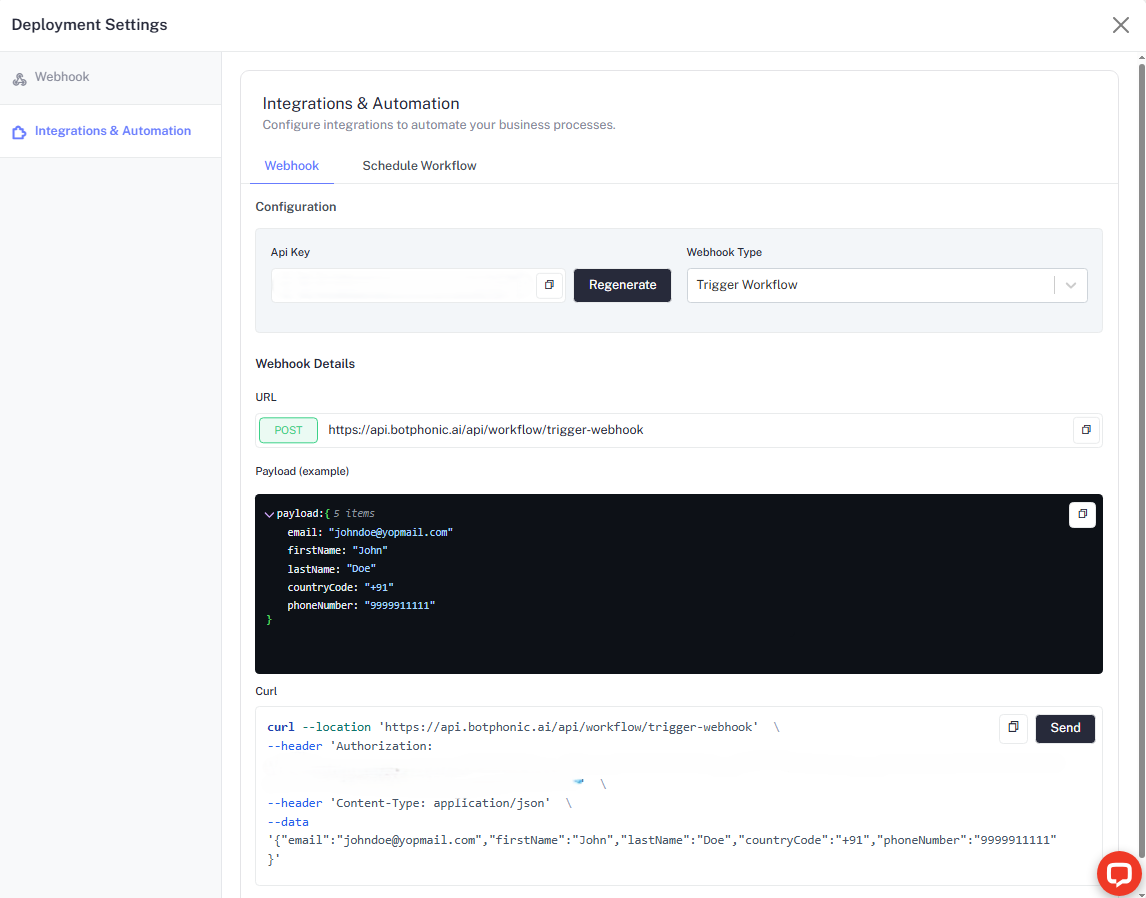
- API Key: Use the provided Bearer token to authorize your requests. Click Regenerate to refresh security credentials if they are compromised.
- Webhook Type: You can toggle between two primary actions which will dynamically update the provided documentation and curl commands:
- Trigger Workflow: Initiates a new workflow journey for a contact.
- Workflow Execution Cancel: Stops an active workflow for a specific execution ID.
- Webhook Details: Use the provided URL and method to communicate with the API.
- Payload Example: For triggering, the expected JSON includes
email,firstName,lastName,countryCode, andphoneNumber.
Integration Examples
Trigger Workflow Use this command to enroll a contact into the workflow:
curl --location '[https://api.botphonic.ai/api/workflow/trigger-webhook](https://api.botphonic.ai/api/workflow/trigger-webhook)' \
--header 'Authorization: Bearer YOUR_API_KEY' \
--header 'Content-Type: application/json' \
--data '{
    "email": "johndoe@yopmail.com",
    "firstName": "John",
    "lastName": "Doe",
    "countryCode": "+91",
    "phoneNumber": "9999911111"
}'- Curl Command: A ready-to-use snippet is dynamically updated in the dashboard based on your selected Webhook Type to help developers integrate the logic into your backend quickly.
Workflow Campaigns (Scheduling)
The Schedule Workflow tab allows you to run your logic against specific contact groups and track their progress in bulk.
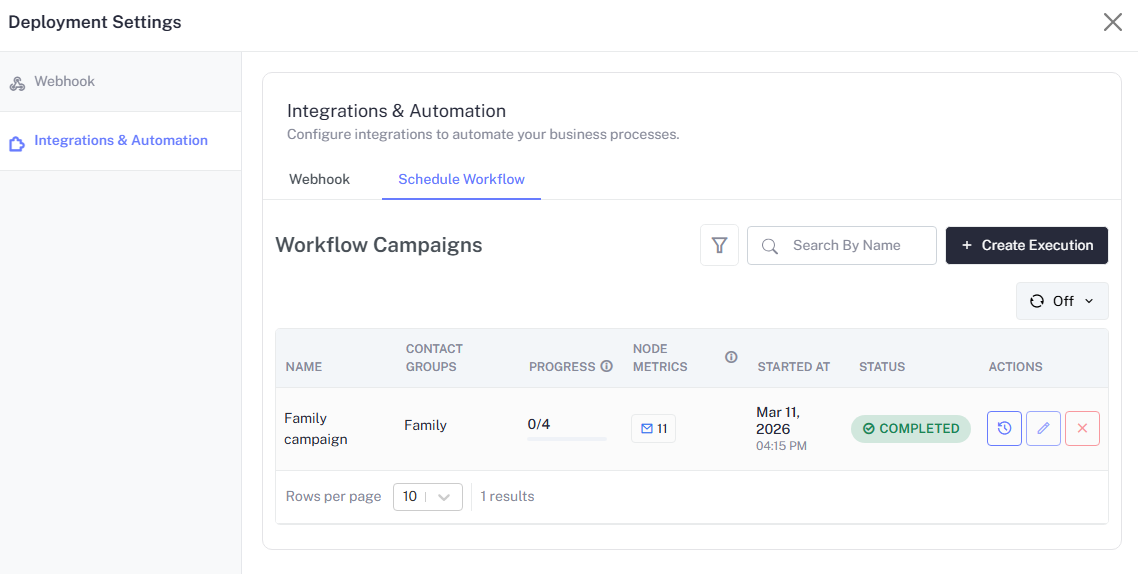
Managing Campaigns
- Campaign Overview: View a list of all current and past executions.
- Progress Tracking: See real-time completion ratios (e.g.,
1/1contacts processed). - Node Metrics: Monitor specific node engagement, such as the number of emails sent in a campaign.
- Status Indicators: Monitor whether a campaign is currently running or has reached a
COMPLETEDstate. - Action Controls:
- History: View detailed execution logs for that specific campaign.
- Edit: Modify campaign parameters before a re-run.
- Delete: Remove the campaign record from your dashboard.
Workflow Execution
Once your workflow is designed and saved, you need to execute it to begin the automation process. You can trigger executions in two primary ways: as a Campaign for bulk processing or as an Individual execution for single leads.
Creating an Execution
To manually trigger a workflow, navigate to the Schedule Workflow tab in Deployment Settings and click the + Create Execution button.
1. Campaign Execution (Bulk)
Use this option to run a workflow against an entire segment of your audience at once.
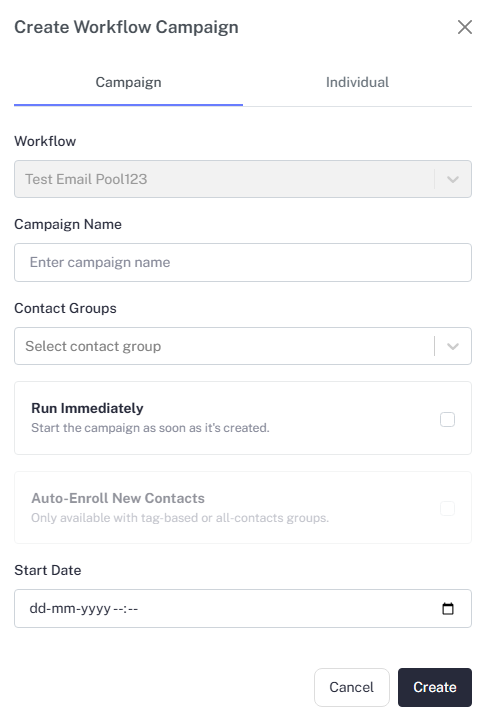
- Select Workflow: Choose the finalized workflow logic you wish to deploy.
- Campaign Name: Give your execution a unique name to distinguish it in your logs.
- Contact Groups: Select one or more pre-defined groups of contacts to be enrolled.
- Run Options:
- Run Immediately: Start the workflow as soon as the campaign is created.
- Auto-Enroll New Contacts: Automatically trigger the workflow whenever a new contact is added to the selected tag-based or all-contacts groups.
- Start Date: If not running immediately, use the calendar picker to schedule a future launch.
2. Individual Execution (Single)
Use this for testing purposes or for triggering a journey for a single person.

- Select Workflow: Choose the logic intended for the individual lead.
- Contact Selection:
- Use Existing Contact: Search and select from your current database.
- Create New: Enter details for a new contact to immediately start them on the flow.
- Run Workflow: Click the button to immediately initiate the first node for that contact.
Execution Tip: When running a bulk campaign, ensure your Email Pool has enough capacity to handle the volume to avoid delivery delays.
Scheduling Note: All scheduled start dates and times are processed according to the Global Timezone set in your workflow header.